|
Philips 107P10 Professional Monitor
The software and drivers
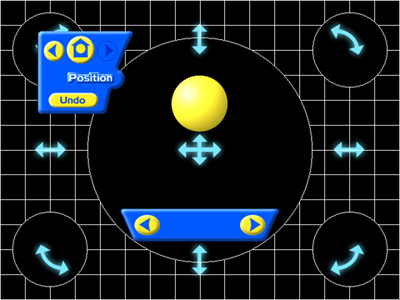
The 107p10 ships with an impressive little program called "CustoMax".
The way customax works is like so - You plug the supplied USB cable into your
monitor and the back of your computer, the monitors usb is detected and the
drivers installed from the CD, you use the CustoMax software to adjust the on
screen image, making it far easier to adjust your scren image, as, rather than
using the OSD, you can use your mouse to drag sliders etc to adjust the screen
image.
Here is a screenshot of the program at 640x480:
Also included is the ICE program, which is a step by step program to help you
set up your new monitor (you have to use the OSD for this step :Þ).
I found the ICE program to be very helpful with getting my convergence settings
right.
The included drivers allow windows to take your monitor all the way up to the
impressive 1920x1440 resolution, whereas the drivers for the 107p10 bundled
with windows do not, so don't make the mistake of not using the bundled cd for
your drivers.
All up I found the drivers and included utils to be a very easy way of setting
up your monitor how you like it.
Also, I'd reccommend going through every resolution and setting the refresh
as high as it can go and then stretching the image to fit the screen, as this
means you can play any game (at resolutions under 1600x1200) flicker free, and
indeed any game without needing to take time to adjust the image.
The OSD includes the following:
| Control |
Function |
| Language |
Allows you to select the language to be
used in the osd. |
| Input signal selection |
Allows you to select wether to use the
BNC or VGA connector |
| Zoom |
Allows you to zoom the image on screen |
| Adjust horizontal |
Allows you to adjust the horizontal position
and size. |
| Adjust vertical |
Allows you to adjust the vertical position
and size. |
| Adjust shape |
Allows you to:
| Adjust Side Curve |
Similar to the pincusion function
found on most monitors |
| Adjust Side Angles |
Similar to the trapezoid function
found on most monitors |
| Rotate Image |
Allows you to rotate the image on
the screen (I often find this of use when going
to friends houses and back. |
|
| Adjust Color |
Allows you to select from various color
settings, including user-preset. |
| Reset to factory settings |
Speaks for itself, I think. |
| Extra Controls |
Allows you to:
| Degauss |
Same as all degauss/demagnify features,
for use when your monito has been exposed to magnetic
fields (displays colored marks on edges etc) such
as speakers |
| Adjust moire |
Allows you to adjust the moire level. |
| Adjust convergence |
A feature most monitors dont actually
have in their OSD, all monitors have convergence
settings however most are inside the casing of the
monitor. Using this, you can adjust the offset of
your RGB colors, in both the vertical and horizontal
axes. Can be quite hard to set right, so I suggest
you use the bundled ICE program. |
|
One note about the convergence settings, is that when the monitor is shipped
the settings may not be correct, so dont freak out (as I did) when the monitor
turns on with all the colors offset and an image that quite quickly gives you
a headache, just turn to the OSD in the extra controls section, and adjust your
convergence.
Controls and Cosmetics
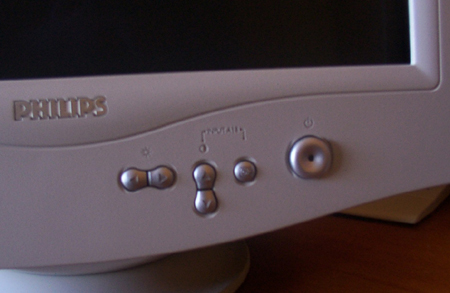
The buttons on the Phillips Professional series are quite stylish, Arranged
logically, they are silver in color, to match the silver Philips logo. A picture is displayed at the top of the page.
Click here for an enlarged image.
The controls are as such:
The left and right controls adjust brightness by default.
Up and down controls adjust contrast by default.
Pressing the Up and Menu button at the same time changes the input select from
BNC toVGA and vice versa.
Pressing the menu button brings up the OSD, the up and down buttons can be used
to select options, and the ok button is used to choose or confirm an option.
The Left and Right controls are used in the menu to adjust individual settings
(first chosen using the up and down controls).
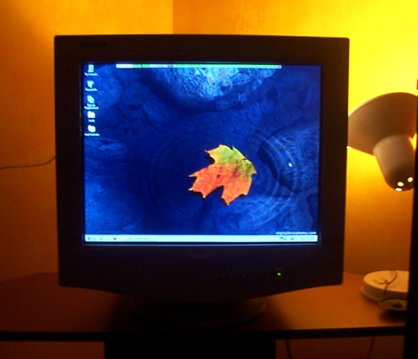
The monitor itself has quite a small footprint as can be seen below:

Small enough?
Another picture, this time taken in the dark with only mild backlighting.
As you can see above, the middle of the power button has the power indicator
LED embedded, In my opinion this looks quite stylish while still remaining funcitonal.
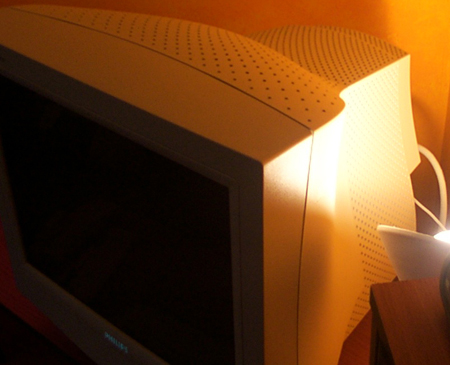
Looks strange, which also means it draws quite a bit of attention at LAN
parties.
I have proven the above theory, the monitor drew quite a bit of attention
at MorBius VGU here in Warrnambool, Victoria (around 50ppl), and everyone who
saw it made a positive comment :D
<< Prev | Next >>
| 

